How to Flip an Image with OpenCV
A step by step tutorial for flipping an image with OpenCV
Updated July 8, 2024
Video of the day:
How to build a DeepSeek R1 powered application on your own server
Subscribe to this Channel to learn more about Computer Vision and AI!
Have you ever wondered how to create a mirror image of a picture? Or turn it upside down? With OpenCV, you can flip or reverse an image quickly with a few lines of code. In this tutorial, we’re going to show you how to flip an image with OpenCV.
If you’d rather watch a video of this tutorial, check it out:
Before we dive into the code, let’s take a moment to understand what flipping an image is and why it’s useful.
What is Flipping an Image?
Flipping an image is the process of reversing it either horizontally or vertically. This can be useful for a number of different image processing tasks, such as creating mirrored images, flipping an image to correct its orientation, or generating additional training data for machine learning algorithms.
Flipping an image in OpenCV is a simple process that can be done using the flip() function. The flip() function takes two arguments: the image you want to flip, and the axis along which you want to flip the image. You can flip an image horizontally by using the value 0, and you can flip an image vertically by using the value 1.
Now that we have a basic understanding of flipping an image, let’s see how we can do it in OpenCV.
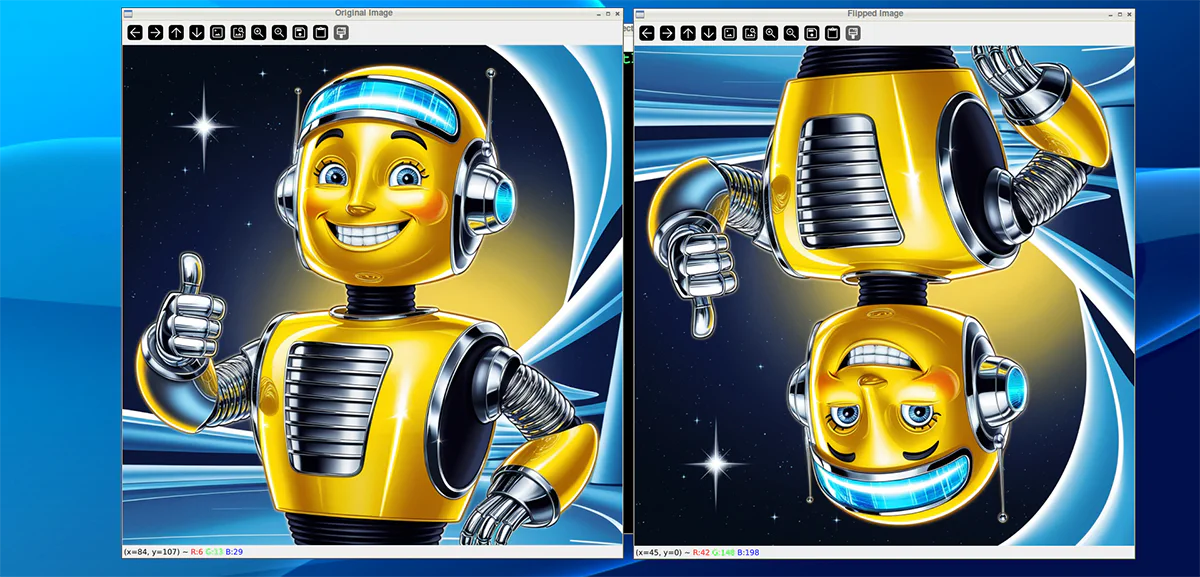
Here is the image we’re starting with:

So let’s go.
Setting up Your Environment
The first step is to create a Python development environment:
mkdir imageflip && cd imageflip
python3 -m venv imageflip
source imageflip/bin/activate
Then we’ll install the OpenCV library
pip install opencv-python
And we’re ready.
Flip the Image Horizontally
Now we need to load the image into OpenCV.
Create a file named main.py. We will import OpenCV, and then use the imread function to read in an image.
import cv2

# Load an image
img = cv2.imread('image.jpg')
Next, we’re going to flip the image horizontally. To do this, we’ll use the flip() function, like this:
# Flip the image horizontally
flipped = cv2.flip(img, 0)
Now, we need to display the image. We’ll use cv2.imshow to show the original image, as well as the flipped image so we can compare:
# Display the original image
cv2.imshow('Original Image', img)

# Display the flipped image
cv2.imshow('Flipped Image', flipped)

# Wait indefinitely until the 'q' key is pressed
while True:
    if cv2.waitKey(1) & 0xFF == ord('q'):
        break

# Destroy all the windows
cv2.destroyAllWindows()
Now we’ll save the file and run it, and see that it worked!

Here’s important line of code:
flipped = cv2.flip(img, 0)
In this example, the flip() function is used to flip the image horizontally, with the value 0 representing the horizontal axis. The flipped image is stored in the variable flipped, and it will be a mirror image of the original image.
Flipping the Image Vertically
Let’s take a look at another example, this time flipping the image vertically. Here’s the code:
# Flip the image vertically
flipped = cv2.flip(img, 1)
And we run it and see this:

And it works!
In this example, the flip() function is used to flip the image vertically, with the value 1 representing the vertical axis. The flipped image is stored in the variable flipped, and it will be an inverted version of the original image.
Flipping the Image Horizontally and Vertically
The final option for flip() is to flip the image horizontally and vertically. You can do it by passing -1 as the parameter:
# Flip the image vertically and horizontally
flipped = cv2.flip(img, -1)

Good stuff!
Writing the Image
So this is great for display purposes, but what if you want to save a new image after modifying it? You can do that by saving the flipped image using cv2.imwrite
# Save the flipped image
cv2.imwrite('flipped_robot.jpg', flipped)
Summary
In this tutorial we learned how to flip an image vertically, horizontally, and a combination of them. We showed how to display the images, as well as write them.
Understanding how to flip an image is important. This is often used in data sets, where flipped images exist to help in training machine learning. It’s good stuff to know.
If you have any questions or comments reach out.
